|
Sue from Boston writes, “I'm looking for a suggestion of what to do with lots and lots of old slides that were my parents'.”
 I have a similar problem – many slides with remarkably similar images. Once upon a time slides were the best way to share your pics with a crowd and preserve high quality images, although many of the ones I have are faded and degraded. In most of mine the slide frame itself is cardboard rather than plastic, and I have a couple that are glass encased in metal. I have a similar problem – many slides with remarkably similar images. Once upon a time slides were the best way to share your pics with a crowd and preserve high quality images, although many of the ones I have are faded and degraded. In most of mine the slide frame itself is cardboard rather than plastic, and I have a couple that are glass encased in metal.
Nowadays of course we can keep and share our images digitally. I learned recently that we should reburn our photo CDs onto new ones every ten to fifteen years to maintain optimal image quality. Rather than do that, I'm inclined to reduce the waste and use an online photo storing service, and just print those images I wish to use for scrapbooking.
Assuming any important images themselves have been backed up digitally, the slides can be repurposed. Here are some ideas:
One of the trends in Scrapbooking is a scrappy, mixed media style incorporating found objects. The pages are very textural, and often include vintage ephemera and items like bingo cards that often have nothing to do with the content of the photos or event being memorialized. They are of purely visual, aesthetic interest.
Slides can be used in this type of page or in mixed media collage as part of the texture. The shiny celluloid might layer and peek out from amongst other pieces.
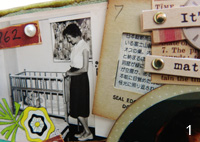
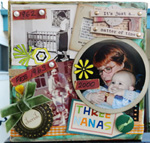
Another part of this trend is to use frames around images or parts of images. Empty slide frames would be perfect in this case, either painted first or left in their aged glory. I've been pretty obsessed with “heritage” projects – using photos of my childhood and family ancestors in layouts and mini-albums, so distressed ephemera helps. (See photo above left and #1, right)
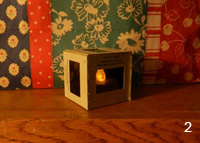
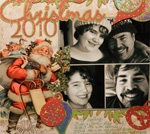
Another use would be to take advantage of the translucent quality of slides to make luminaires of different sizes. Five frames glued together with white or hot glue, or taped, make a nice shade for a battery powered votive “candle”. (I don't recommend open flame for safety reasons.) (See photo #2, right)
Is it crazy to visualize whole miniature houses and villages made from slides affixed together, reinforced with dowels or extra cardboard, and lit from within? This would sure put a new spin on the usual Christmas Village scene. Or perhaps some card houses made from cereal boxes with windows cut and filled with slides of people.– see downloadloadable templates here.
Strung together with craft wire jump rings, a bunch of slides would make an intriguing drape or door curtain, especially if light shone from outside. Slides wired to a lampshade frame (recycled of course) would make a talking point and cast colored light all over the room.
Placing holes in all four corners with a 1/16th inch hole puncher does not damage the image at all, but you could use another hole making method. I make my own jump rings by wrapping craft wire around a dowel, then snipping the rings apart. Link slides together in a column, then use another ring to bring the joints together, so that you have a kind of web of slides.
Six affixed together in a cube would make a shade for holiday string lights, as long as some corners are trimmed to admit the bulb. LED lights are by far the most energy efficient, and have the added advantage that they don't get hot. We purchase one new string every year to add to our stash.
***
More timely paper crafting: reader Ina M. asks, “I have kept last year's Christmas cards that were sent to me. So many of them are too beautiful to toss, and there has to be a way to recycle/upcycle all those lovely Christmas cards. Any ideas?”
 Of course! I'm so glad you asked. Of course! I'm so glad you asked.
I use images from cards in my seasonal scrapbooking and decoupage. I make a strong solution of bicarbonate of soda (baking soda) in water, then paint the back side of the cut out image to remove the acid in the paper. The card tends to curl while it is wet, but usually flattens perfectly well as it dries. Then I glue it to my pages. Vintage style images, with muted colors work well with black and white photos.
Decoupaged canvas frames or open box dioramas (which you know are some of my favorite projects) for your holiday decor can combine card images with quotes, either from the cards or other sources.
Cards can also be cut and reused as gift tags.
Still we can only make so many scrapbook layouts and tags. I use pretty much all my received cards that aren't suitable for scrapbooking for tree decorations.
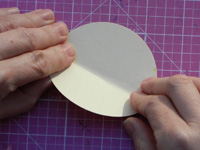
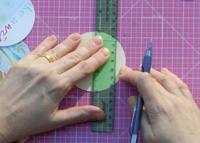
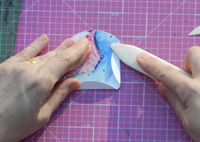
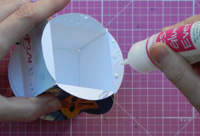
Here's the method, illustrated step-by-step by the photos to the right. (For a how to using a paper punch and scoreboard please visit my Iggy Jingles blog)
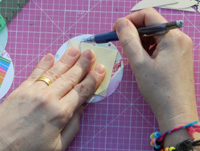
Cut circles from your cards, choosing fun parts of the image – although in the end it really doesn't matter. You can cut circles from the inside with the greeting too. I usually size the circle at around three inches diameter because I have a punch that size, but anywhere between two and three inches works very well. Ideally you will have something to use as a template, like a box lid.
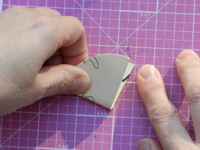
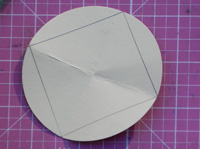
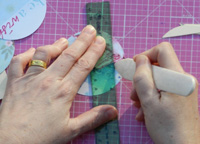
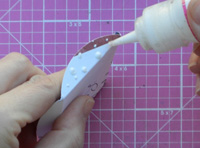
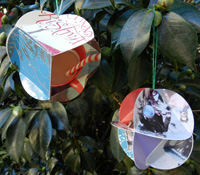 Using one blank circle for size, fold in half and again, to mark the intersections for a square. Cut a square that fits exactly in the circle as a template. With little more measuring and a protractor, or good eye, you can make a similar equilateral triangle template. Outline the square in all your cut circles, score with a bone folder, stylus or blunt knife (like a butter knife) and fold up the segments along the lines, towards the right side. Using one blank circle for size, fold in half and again, to mark the intersections for a square. Cut a square that fits exactly in the circle as a template. With little more measuring and a protractor, or good eye, you can make a similar equilateral triangle template. Outline the square in all your cut circles, score with a bone folder, stylus or blunt knife (like a butter knife) and fold up the segments along the lines, towards the right side.
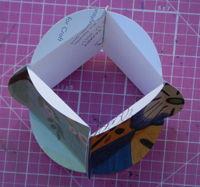
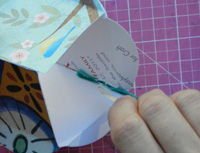
Glue the folded segments together with the pattern facing out. Six circles with squares make a cube, while four triangles make a pyramid, and eight a pretty oval ornament. I glue a loop of colored cording for hanging poking from the inside at one corner. I like to randomize my circles, rather than use many from the same card in each ornament.
Too plain? Add some glitter glue, sparkly shapes, buttons or photos to the centers of the squares or triangles.
By the way, Ina, this also works great with wallpaper – but that's another column!
After a long career designing for theater and independent films, Robyn Coburn finds her joy as an unschooling mother who also writes and crafts. She has been a confirmed greenie since working for Greenpeace during her college years in Australia. Robyn is currently working on two crafty books, a fairy tale screenplay and a TV series about doll making and collecting. A past speaker and funshop presenter at Live and Learn Unschooling conferences, she contributes regularly to unschooling e-lists. She lives in Los Angeles, California with her husband James and ever inspiring daughter Jayn. Contact Robyn by email at dezignarob@gmail.com or visit her at www.robyncoburn.blogspot.com and www.Iggyjingles.etsy.com.
|